

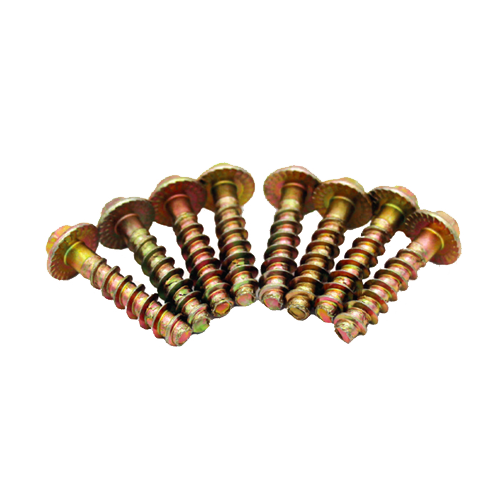
*Image for illustrative purposes only
*Due to the many variations in monitors and browsers, color samples may appear different on different monitors
-----
Complete Guide to Screws for Castor Wheels
The safety, stability, and load capacity of any piece of mobile equipment—from heavy warehouse carts and industrial waste bins to hospital linen trolleys—depend entirely on the quality of its mounting hardware. While a castor wheel assembly carries the weight of the load, the screws and mounting fasteners hold the wheel plate flush against the equipment frame.
Using improper, weak, or loose screws can lead to frame wobbling, stripped mounting holes, structural shearing under shock loads, or total wheel separation during transit. Selecting the right heavy-duty mounting screws ensures that your castor wheels remain anchored, aligned, and safe for daily commercial and industrial use.
This comprehensive guide covers everything you need to know about Screws for Castor Wheels—including their mechanical role, thread types, material choices, step-by-step mounting procedures, and preventative maintenance protocols.
What Are Screws for Castor Wheels?
Castor wheel screws (or mounting bolts) are specialized threaded fasteners designed to attach the top plate or stem of a castor assembly to the base of equipment frames, carts, machinery, or furniture.
Rather than serving as basic connectors, castor mounting screws perform critical structural functions:
-
Shear and Tensile Resistance: They bear the lateral shear forces generated when steering heavy carts around corners, as well as the vertical tensile stress when equipment is lifted or rolled over floor obstacles.
-
Vibration Resistance: Equipped with locking threads, spring washers, or locknuts, they resist loosening caused by continuous vibration from hard floor seams and expansion joints.
-
Plate Alignment & Distribution: They clamp the top plate uniformly against the mounting surface, ensuring that downward weight is distributed evenly across all four mounting points.
Key Performance Features & Technical Advantages
Quality castor mounting screws are engineered to handle high torque, resist environmental corrosion, and maintain structural clamping force under heavy daily usage.
1. High-Tensile Material Construction
Using low-grade general wood screws or soft metal fasteners on heavy equipment leads to sheared bolt heads and stripped threads when carrying high-capacity loads.
-
Heavy-Duty Structural Steel: Formed from high-tensile carbon steel or stainless steel alloys designed to absorb high dynamic impact loads without stretching or snapping.
-
Corrosion-Resistant Plating: Protected by zinc plating, galvanization, or stainless steel formulation to resist rust, moisture, chemical spills, and cleaning agents in washdown bays and commercial kitchens.
-
Precision Thread Pitch: Engineered with clean, uniform threads (coarse or fine depending on metal or timber mounting applications) that maximize thread engagement and resistance to pull-out forces.
2. Specialized Head Styles for Flush & Rigid Mounting
The physical design of the screw head determines how securely the castor mounting plate locks onto the equipment frame:
-
Hex Head Bolts: Allow maximum torque application using socket wrenches or spanners, ideal for heavy industrial equipment and structural steel frames.
-
Countersunk Screws: Sit flush inside countersunk plate holes, preventing protruding bolt heads from catching on cargo or floor debris.
-
Pan / Button Head Screws: Provide a broad bearing surface over mounting plate slots, preventing plate slippage without biting into the metal plate coating.
Improper Fastening vs. Heavy-Duty Castor Mounting Screws
Using improvised screws or incorrect fastening methods introduces severe operational hazards and equipment maintenance issues.
Sector-By-Sector Application Guide
Secure mounting screws are essential across every sector using mobile material handling equipment:
1. Warehouses, Freight & Logistics Facilities
-
Heavy Material Handling Carts: Secures high-capacity castor plates onto steel order-picking trolleys navigating concrete floors under multi-hundred-kilogram loads.
-
Loading Dock Trolleys: Withstands impact spikes and vibration when carts pass over dock levelers and doorway threshold tracks.
2. Manufacturing & Industrial Plants
-
Mobile Tool Stations & Cabinets: Fastens castor plates securely to heavy steel tool chests and mobile workbenches, maintaining rigid stability when parked.
-
Parts Assembly Racks: Holds up against constant vibration and heavy steel component transport without backing out.
3. Waste Management & Municipal Facilities
-
Commercial Waste Bins & Tilt Trucks: Fastens large 200mm metal or rubber castor plates to heavy plastic or steel waste containers exposed to rain, mud, and rough asphalt.
4. Healthcare Facilities & Hospitals
-
Utility & Linen Carts: Keeps mounting hardware secure and silent on linen hampers and mobile equipment carts without producing squeaks or metal chatter.
-
Sanitary Environments: Stainless steel fasteners handle repeated steam cleaning and chemical disinfection without rusting.
5. Hospitality & Commercial Buildings
-
Housekeeping & Catering Trolleys: Ensures clean, flush fastening on housekeeping carts and banquet tables moving across carpeted and tiled guest areas.
Step-by-Step Installation & Mounting Guide
Properly mounting your castor wheels ensures even load distribution, prevents frame damage, and eliminates wobble. Follow these steps to secure castor plates correctly.
Step 1: Gather Tools and Fastening Hardware
Before starting, ensure you have:
-
The appropriate Castor Wheel Screws/Bolts (matching the mounting plate hole diameter)
-
Compatible washers (flat washers and split lock washers) and locknuts (nyloc nuts)
-
Socket wrench set or spanners (or appropriate screwdriver bits)
-
Safety glasses and work gloves
Step 2: Prepare the Mounting Base
-
Unload the cart or equipment completely and turn it upside down safely.
-
Inspect the mounting holes on the equipment base. Ensure the surface is clean, flat, and free of burrs or rust.
-
Align the castor top plate over the pre-drilled frame holes.
Step 3: Insert Screws and Washers
-
Place a flat washer onto each screw/bolt. Flat washers distribute clamping pressure across the top of the castor mounting slot.
-
Insert the screws through the top plate holes and through the equipment frame base.
Step 4: Attach Lock Washers and Nuts
-
On the opposite side of the frame, place a lock washer (or flat washer) and thread a nylon-insert locknut (nyloc nut) onto each bolt end by hand.
-
Note: Using nyloc nuts or split spring washers is vital to prevent continuous floor vibration from loosening the assembly.
Step 5: Torque Fasteners in a Diagonal Pattern
-
Hold the screw head with a wrench or bit while tightening the nut on the other side with a socket wrench.
-
Tighten the four screws in a diagonal cross-pattern (top-left, bottom-right, top-right, bottom-left) to apply equal clamping pressure across the entire top plate.
-
Torque firmly, but do not overtighten to the point of stripping threads or crushing plastic cart frames.
Step 6: Test Installation & Rigidity
-
Push the castor plate by hand to confirm there is zero wobble between the top plate and the equipment base.
-
Turn the equipment right-side up and test roll it across the floor to verify smooth mobility and rigid attachment.
Preventative Maintenance & Care Protocol
Periodic fastener maintenance prevents unexpected wheel failure and keeps equipment rolling safely.
Weekly Routine Checks
-
Check for Loose Bolts: Visually inspect mounting plates for gaps or movement. Check that screw heads sit flush against the plate.
-
Listen for Rattles: Excess clattering or metallic rattling during transit usually indicates loose mounting fasteners.
Monthly Maintenance Protocols
-
Check Fastener Torque: Put a wrench on mounting nuts to verify they remain tight despite floor vibrations.
-
Inspect for Corrosion: Check screw heads and threads for surface rust or chemical degradation. Replace corroded fasteners before they snap or seize up.
Cleaning Protocols
-
Remove Debris: Clear away accumulated grease, dirt, or string caught around mounting bolt heads.
-
Dry Fasteners: After washing down equipment with water or degreasers, dry the fastener area to protect unpainted steel surfaces.
Troubleshooting Common Issues
Use this guide to quickly diagnose and resolve common castor wheel screw and mounting problems.
Issue 1: Mounting Screws Keep Loosening Over Time
-
Likely Cause: Standard nuts were used without lock washers or nylon inserts, allowing floor vibration to back the nuts off.
-
Solution: Replace standard nuts with nylon-insert locknuts (nyloc nuts) or add split spring washers beneath standard nuts.
-
Issue 2: Screw Threads Are Stripped in a Wooden or Thin Sheet Metal Frame
-
Likely Cause: Screws were over-torqued during installation, or undersized self-tapping screws pulled out under heavy weight.
-
Solution: Drill through the frame hole completely and replace self-tapping screws with a through-bolt, flat washer, and locknut system.
-
Issue 3: Screw Heads Are Shearing Off Under Load
-
Likely Cause: Low-grade, soft hardware store screws were used instead of high-tensile structural bolts.
-
Solution: Extract broken screw shanks and upgrade to Grade 8.8 or Grade 304/316 stainless steel heavy-duty mounting bolts.
-
Frequently Asked Questions (FAQs)
Q1: What size screws should I use to mount a castor wheel?
The screw diameter must closely match the diameter of the holes or slots in the castor's top plate (commonly M6, M8, M10, or M12 bolt sizes). Using screws that are too small allows the top plate to slide around on the bolt shanks.
Q2: Is it better to use bolts with nuts or self-tapping screws for castors?
Through-bolts with locknuts are the most secure method, especially for heavy commercial and industrial carts. Self-tapping screws should only be used on light-duty equipment with thick timber or threaded metal plate bases.
Q3: Why are nylon-insert locknuts (nyloc nuts) recommended for castor installation?
Floor vibrations from rolling over concrete seams, expansion joints, and threshold tracks cause standard nuts to unscrew over time. Nylon inserts grip the bolt threads, preventing nuts from backing off.
Q4: Should I use washers when installing castor wheel screws?
Yes. Place flat washers under the bolt head and nut to distribute clamping pressure evenly over the castor plate slots. Adding a spring lock washer or using a nyloc nut ensures long-term tightness.
Q5: How many screws are needed per castor wheel?
Standard plate castors feature four mounting holes or slots, requiring four screws or bolts per wheel (16 total for a standard four-wheeled trolley) to ensure balanced load distribution.
Q6: What hardware is best for wet or outdoor environments?
Use Grade 304 or Grade 316 stainless steel screws, washers, and nuts, or hot-dip galvanized fasteners to prevent rust and corrosion in outdoor, wet, or chemical washdown areas.
Q7: Can I re-use old mounting screws when replacing castor wheels?
Only if they are in excellent condition without rusted threads, rounding on the screw heads, or bending. It is best practice to install fresh, high-tensile fasteners when replacing worn castor wheels.
Q8: What causes a castor mounting screw to shear off?
Screws shear due to severe weight overloading, abrupt side impacts (hitting curbs or loading dock levelers), or using soft, low-grade screws that lack the necessary shear strength for structural loads.
Q9: How tight should castor mounting screws be torqued?
Tighten screws securely until the spring washer is fully compressed and the mounting plate rests completely flush against the frame without flexing. Avoid over-torquing to the point of stripping threads or cracking cart frames.
Q10: How do I stop castor screws from rusting in commercial kitchens or washdown bays?
Always choose stainless steel fasteners (304 or 316 grade) for wet or food-handling environments, as they resist chemical cleaners, water, and organic acids without rusting or seizing.